
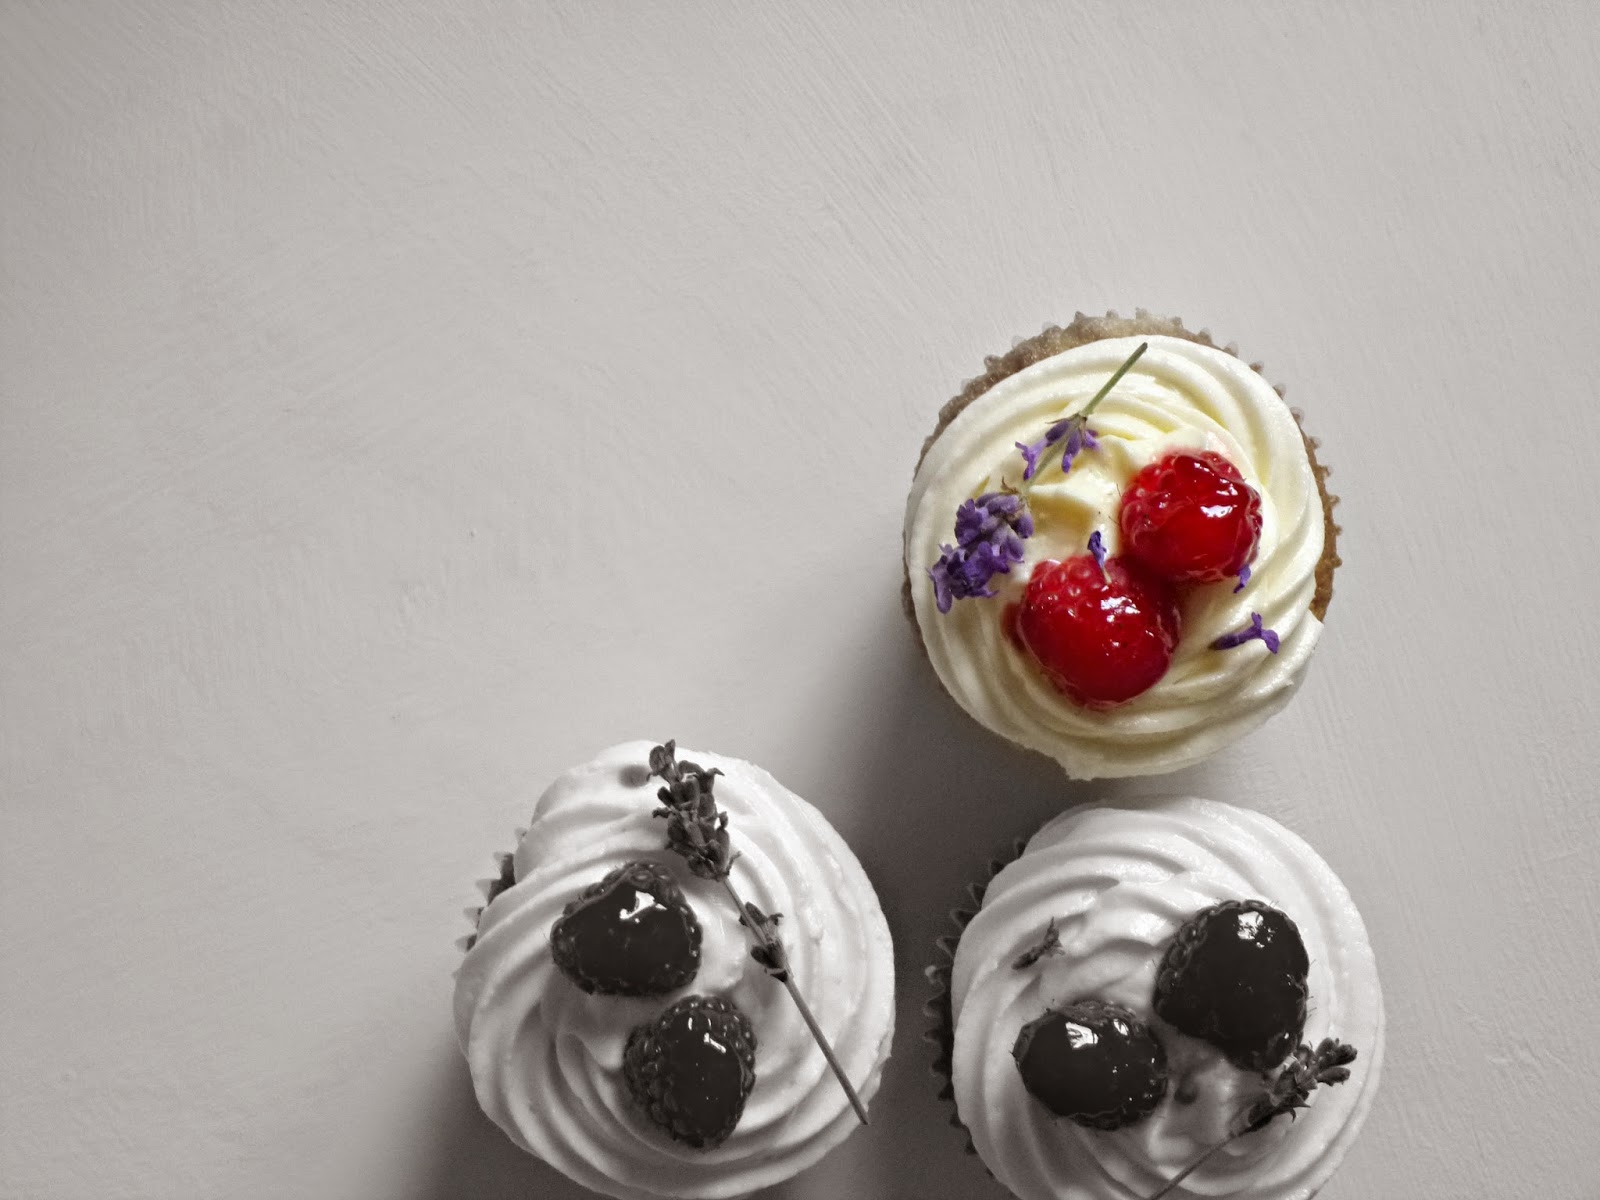
I don't know what it is about lavender and raspberries...but they just match together so well with their summer aura which make them perfect companions smothered in rich buttercream icing. These cupcakes not only relaxes for its traditional comforting qualities, but also because it is lavender infused, to ensure complete calm. So if your having a pretty hectic weekend, maybe it's time that you put all that aside, get your bowl and wooden spoon out and knock up a batch of these bad boys!!
When getting to the section of the recipe where it says "fill the centre with raspberry jam" - don't feel obligated to do that! If you feel they will be sweet enough for you as they are (and you don't happen to have as much of a sweet tooth as me) then don't put it in. Soooo many decisions!!

Oh and for leftovers (ha, probably no chance of that happening but...), make sure to keep them stored away in the fridge because of the raspberries. So on with the recipe I hear you say...well here it is!
Lavender and Raspberry Cupcakes
Ingredients (makes 12)
130ml milk
1 tsp edible lavender flowers
225g salted butter, at room temperature
225g caster sugar
4 eggs
250g self-raising flour
For the buttercream
160g salted butter, at room temperature
500g icing sugar
50ml lavender milk (see above)
To finish
24 fresh raspberries
2 tbsp raspberry jam to glaze
+ 12 tsp raspberry jam to fill (optional)
Method
Preheat your oven to 180°C/ Gas 4/ 350°F
To make the cake batter, first infuse the milk by pouring it into a small saucepan with the lavender flowers and heating over a low heat for about 10 mins. Leave to cool completely, then strain into a bowl to remove the flowers.
Cream the butter and sugar together in a mixing bowl using a wooden spoon or electric beaters, or using the paddle attachment in a free standing mixer, until paler in colour, smooth and creamy. Then add the eggs one at a time and beat until you have a smooth mixture. Finally, fold in the flour and 80ml of the lavender milk.

Scoop heaped tablespoons of the mixture into a cupcake tray lined with cases. Bake for 20-25 mins, or until nicely golden brown and a skewer inserted comes out clean. If inserting raspberry jam in the centre, core out the middle of the cupcakes whilst still warm (you can buy specialist cupcake corers/plungers that do this, but just use a knife if you don't have one). Leave the cupcakes to cool completely before icing.
Meanwhile, make the buttercream. Beat the butter until very soft, then add the icing sugar and mix together. When the butter is well incorporated into the icing sugar, pour in the remaining 50ml of the lavender milk and beat until smooth. You can then spoon this into a piping bag with desired nozzle (I used a star nozzle) if you don't want to spread onto the cake using a palette knife.

Spoon a teaspoon of raspberry jam into the middle of each cupcake, or leave plain if you wish not too.
Pipe swirls of buttercream onto your cupcakes and then place 2 raspberries on the top. Next to make the glaze, put the 2 tbsp of jam into a saucepan with 1 tbsp of water, place over a medium heat and bring to the boil. Pass through a sieve (if not seedless) then, while the jam is still warm, use it to glaze the raspberries, painting it on with a pastry brush.


Cream the butter and sugar together in a mixing bowl using a wooden spoon or electric beaters, or using the paddle attachment in a free standing mixer, until paler in colour, smooth and creamy. Then add the eggs one at a time and beat until you have a smooth mixture. Finally, fold in the flour and 80ml of the lavender milk.
Scoop heaped tablespoons of the mixture into a cupcake tray lined with cases. Bake for 20-25 mins, or until nicely golden brown and a skewer inserted comes out clean. If inserting raspberry jam in the centre, core out the middle of the cupcakes whilst still warm (you can buy specialist cupcake corers/plungers that do this, but just use a knife if you don't have one). Leave the cupcakes to cool completely before icing.
Meanwhile, make the buttercream. Beat the butter until very soft, then add the icing sugar and mix together. When the butter is well incorporated into the icing sugar, pour in the remaining 50ml of the lavender milk and beat until smooth. You can then spoon this into a piping bag with desired nozzle (I used a star nozzle) if you don't want to spread onto the cake using a palette knife.
Spoon a teaspoon of raspberry jam into the middle of each cupcake, or leave plain if you wish not too.
Pipe swirls of buttercream onto your cupcakes and then place 2 raspberries on the top. Next to make the glaze, put the 2 tbsp of jam into a saucepan with 1 tbsp of water, place over a medium heat and bring to the boil. Pass through a sieve (if not seedless) then, while the jam is still warm, use it to glaze the raspberries, painting it on with a pastry brush.
Post a Comment